Unknowndivide may earn a commission from purchases made through links in this post.
Waxed cotton is one of the few fabrics designed to be maintained rather than replaced. When the finish wears down, you add more, and the jacket goes back to shedding rain like it did on day one. The process scares a lot of owners, but it is simple, cheap and takes less than an hour. This guide follows the method laid out in Filson's own rewaxing instructions, written for its oil finish Tin Cloth and Shelter Cloth, with a few notes on how to make it go smoothly.
Why rewaxing matters
A waxed jacket resists water because wax fills the weave of a tight cotton cloth. As you wear it, rain, mud, rubbing and flexing gradually remove that wax, especially at the shoulders, elbows, cuffs and pocket edges. If you never replace it, the fabric slowly behaves more like plain canvas and starts to soak up water. Our waxed canvas explainer covers how that finish works in more detail.
How often to rewax
Filson recommends rewaxing about every two years under typical use. That is a starting point rather than a rule. If you wear your jacket every day for outdoor work, you will need to do it more often, and if it mostly sees weekend walks, it may go longer. Instead of following a calendar, watch for the signs.
The signs your jacket needs it
- No more beading. Water soaks in or spreads across the surface instead of forming droplets.
- Dry patches. Some areas look lighter or feel dry compared with the rest of the jacket.
- More absorption. The fabric feels damp or heavy after rain where it used to stay dry.
Choose the right wax
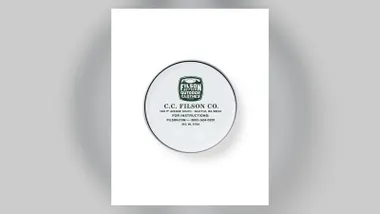
This step matters more than any other. For Filson's oil finish fabrics, the company recommends its Original Oil Finish Wax, a paraffin based dressing that matches the factory finish. Filson cautions that other waxes, beeswax in particular, may not bond properly with the existing finish. A wax that does not bond can stay tacky and wear off quickly. We cover the tin itself in our Filson Oil Finish Wax post. If your jacket comes from another maker, use what that maker recommends.
Gather your supplies
You do not need much, and you probably own most of it already:
- A tin of the right wax
- A heat gun or a hair dryer
- A nylon brush
- A few clean rags
- An old towel to work on
Filson also mentions that a clothes iron kept only for this job can be used to work wax into the fabric. Do not use the iron you press your shirts with afterward.
Step 1: Clean the jacket
Start with clean fabric. Rinse off any mud with cold water and let the jacket dry completely. Once it is dry, use the nylon brush to clear dirt from the seams and pockets, which is where grit tends to collect. Never put waxed cotton in a washing machine, and do not dry clean it.
Step 2: Apply the wax
Lay the jacket flat on the towel. Keep the wax at room temperature, then dab it onto the fabric in small dots spaced about an inch apart. Take a rag and work the wax into the cloth using small circular motions, spreading it into an even layer. Pay extra attention to the areas that showed the most wear, and work one section at a time so you do not miss spots.
Step 3: Add heat
Heat helps the wax melt into the fibers rather than sitting on top. Hold your heat gun or hair dryer 6 to 8 inches from the fabric on a medium setting and keep it moving. You will see the wax darken and disappear into the weave as it absorbs. If the weather cooperates, Filson notes that leaving the jacket in direct sun for a few hours also does the job.
No heat gun, hair dryer or spare iron on hand? Filson suggests hanging the garment near a wood burning stove or a heater so the fabric warms gradually. It takes longer, but the slow warmth still helps the wax work its way into the cloth, and it is a good option in winter when sunny days are scarce.
One firm rule from Filson is that the fabric should never get too hot to touch. If the surface starts to feel hot, lower the setting or move the tool farther away.
A note on patience
Rewaxing rewards a slow hand. Thin, even layers absorb better than thick ones, and working in sections keeps the wax from cooling on the surface before you can heat it. If you are doing a full jacket for the first time, set aside an evening, put on some music and treat it as part of owning the jacket rather than a chore.
Step 4: Let it rest
Once the wax is absorbed, let the jacket rest and cool so the finish can set. Hang it somewhere away from heat and give it time before you wear it out in the rain.
Dealing with excess wax
If you find streaks or a waxy residue once the jacket cools, warm the area again and wipe it with a clean rag. The extra wax will lift off or soak in. It is better to apply too little and add a second light coat than to cake the fabric in one go.
It works on more than jackets
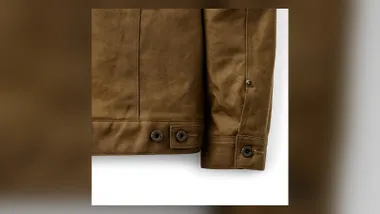
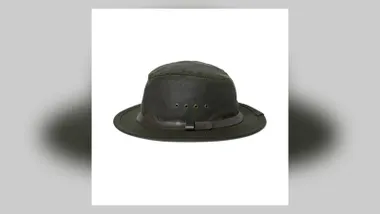
The same process works on oil finish hats, bags and pants. A jacket like the Tin Cloth Short Lined Cruiser is the classic candidate, but a Tin Cloth bag or hat benefits just as much. For waxed jackets from other brands, such as the Barbour Bedale, follow the maker's instructions and use its recommended dressing.
Where to buy
For more heritage workwear and care, browse our denim and workwear hub.