Unknowndivide may earn a commission from purchases made through links in this post.
Developing black and white film at home is a rite of passage. Color film has a reputation for being harder, with strict temperatures and more steps. Simplified kits have changed that. With two chemical baths and the same tank you already use for black and white, you can develop color negative film in your kitchen. This guide explains how home C-41 works, using the instructions and guidance CineStill publishes for its Cs41 kit.
What C-41 is
C-41 is the chemical process for color negative film. CineStill says its CineStill 800T and CineStill 50D are prepped for standard C-41 lab processing or for home development with its Cs41 kit, and it says the kit can process any color negative film at home. CineStill says its 50D, for example, produces standard color negatives that scan well and suit RA-4 darkroom printing when processed in C-41 chemistry.
Two baths instead of many
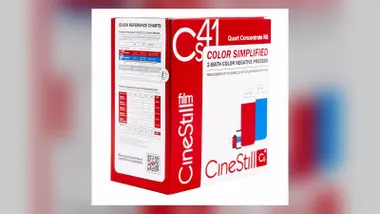
CineStill's Cs41 Color Simplified kit uses just two chemical mixtures:
- Cd41 Color Developer: CineStill says it is made with the maximum concentration of color developing agents (CD4), which makes it more robust and reusable.
- Bf41 Bleach and Fixer: a blix that combines the bleaching and fixing steps into one bath.
What about the stabilizer bath older processes call for? CineStill says a stabilizer is not required when processing modern film stocks, because modern color negative emulsions have built in dye stabilizers and hardeners that are released through the two bath process. The result, it says, is negatives that are developed, bleached and fixed, and ready to scan or print.
Equipment
CineStill says the kit is compatible with the same developing tanks you may already use for black and white film. You do not need a separate tank and reels for color, it says, as long as you wash everything well after each session to avoid cross contamination. Beyond the tank, you need a way to keep the chemistry warm, such as a water bath, plus a thermometer and a timer.
CineStill also says constant rotary agitation processors are compatible, with no adjustment to processing time needed.
Temperature and time
Temperature is where color gets serious. CineStill recommends the standard 102°F processing temperature, but says it has also tested lower temperatures with longer times. Those options are in the push, pull and variable temperature chart in the kit's instructions.
CineStill's recommended developer time is 3 minutes 30 seconds, a little longer than the usual 3 minutes 15 seconds. Its reasoning is practical. The kit is optimized for small tanks and reels at home, where temperature loss during pouring and agitation is unavoidable, even with a water bath. To compensate, CineStill recommends a target temperature about 1°C higher and a time 15 seconds longer than standard large tank processing. It adds that it is better to err on the side of slight over development than under development.
To pre soak or not
The kit lists a pre soak as optional. CineStill explains the trade off: a pre soak helps bring the film up to temperature, but it dilutes the start of development and slows absorption by about 15 seconds. Cold, dry film absorbs full strength developer, but causes a temperature drop of around 1 to 2°C. Either way, the point is to know what your process does to temperature and adjust.
Reusing the chemistry
Two bath kits go a long way because they are reusable. CineStill says the developer can process a recommended 24 rolls per liter or quart. To compensate for weakening, you increase developer time by 2 percent for each roll previously processed. The blix is mixed to a liter or quart of reusable solution that clears at least 24 rolls, and unlike the developer, you do not need to increase blix time as you use it.
Keep a simple log on the bottle so you always know how many rolls have been through it.
Liquid or powder
CineStill makes the kit in liquid and powder concentrate forms. Once mixed, it says, both work exactly the same. The differences are in storage:
- Powder: longer shelf life and takes up less space. Unmixed, its shelf life can be indefinite with proper storage. It takes longer to mix and dissolves best in warm or hot water.
- Liquid: unmixed shelf life of about 2 years from purchase. The liquid quart kit also includes an optional final rinse that can prevent organic growth on negatives stored in damp conditions.
Push and pull
Developing at home also gives you control over push and pull processing. CineStill says films like 50D can be pushed or pulled with the Cs41 kit, using the chart in the instructions. Pushing generally increases contrast and grain. Our guide to push processing explains when it is worth it.
Tips for your first roll
Read the kit instructions from start to finish before you mix anything, and check the variable temperature chart if you cannot hold 102°F. Bring the chemistry to temperature first, then keep it there in a water bath while you work. Start with a roll you shot for practice rather than a once in a lifetime trip. Once the negatives are dry, compare them with lab results from the same film. If they look thin, CineStill's advice to lean toward slight over development is the place to start.
Disposal
When the chemistry is exhausted, dispose of it properly. CineStill notes that regulations vary widely by location, so check your local rules for photochemical waste.
Getting started
If you already develop black and white film, you have most of what you need. Add a kit, a reliable way to hold temperature and a roll you do not mind practicing on. Our review of the CineStill Cs41 kit covers the kit itself in more detail.
For more gear we love, browse our buying guides.